There is a specific feeling that hits every petrolhead when the final frost of winter melts away. It’s not just the warmer weather; it’s the realization that Show Season is upon us.
For over two decades, I have walked the manicured lawns of Pebble Beach and the asphalt parking lots of local Cars & Coffee meetups. I have seen million-dollar Ferraris lose points for dirty wheel wells, and I have seen humble Datsun 240Zs steal the spotlight through sheer, meticulous preparation.
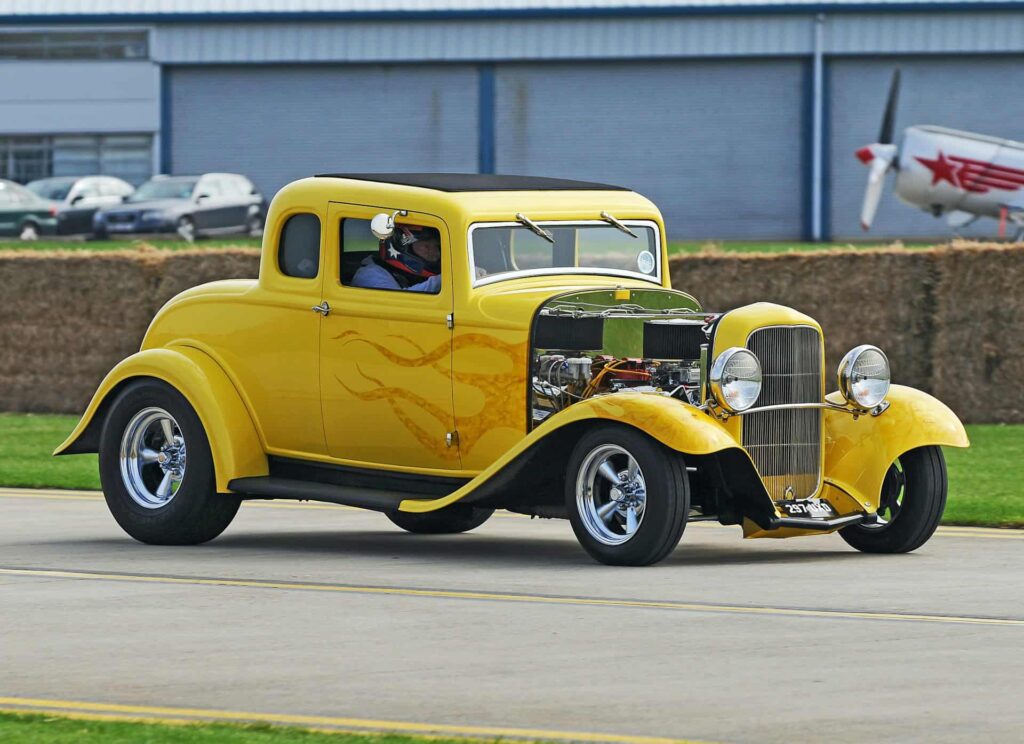
Bringing a classic car out of hibernation isn’t just about turning the key and hoping for the best. It is a ritual. It is the intersection of mechanical preservation and aesthetic perfection. Whether you are chasing a “Best in Show” trophy or simply want to be the sharpest ride at the Sunday cruise-in, the preparation starts weeks before the event.
Below is your definitive, step-by-step guide to prepping your classic car for show season. We aren’t just washing a car here; we are curating a piece of history.
Phase 1: The Mechanical Shakedown (Safety Before Shine)
Before we talk about wax, we have to talk about roadworthiness. There is nothing more embarrassing than a pristine Jaguar E-Type on the back of a tow truck three miles from the show entrance. Winter storage can be harsh on vintage mechanics.
1. The Fluid Audit
Fluids are the lifeblood of your classic, and sitting idle is often worse for them than running hot.
- Engine Oil: Even if you changed it before storage, check the levels and consistency. If you didn’t change it before winter, change it now. Old oil contains acids and combustion byproducts that can etch bearings over time.
- Brake Fluid: This is hygroscopic, meaning it absorbs moisture from the air. Spongy brakes on a drive to a show can be terrifying. If the fluid looks like dark maple syrup, flush it.
- Coolant: Check for separation or sludge. A classic car idling in line to enter a car show is a prime candidate for overheating. Ensure your cooling system is up to the task.
2. The Battery Revival
Hopefully, you kept your battery on a high-quality tender (like a CTEK or NOCO) during the off-season. If not, don’t rely on a jump start to “charge it as you drive.” A weak battery strains the alternator—a component that is notoriously finicky on vintage cars. Load test your battery; if it’s over five years old, replace it.
3. Tire integrity and “Flat Spots”
Modern radial tires are forgiving, but if you are running bias-ply tires on a pre-war classic or muscle car, sitting in one spot for months creates flat spots.
- Pressure Check: Inflate to the manufacturer’s spec (or slightly higher for storage, then bleed down for driving).
- Sidewall Inspection: Look for dry rot or cracking. A blow-out on a fender-skirted Cadillac can cause thousands of dollars in body damage instantly.
- Date Codes: As a judge, I check tire date codes. If your tires are older than 7-10 years, they are a safety hazard, regardless of tread depth.
Phase 2: The Exterior Decontamination
Now begins the labor of love. Most enthusiasts wash their cars, but show prep requires decontamination. Over time, your paint collects industrial fallout, rail dust, and tree sap that normal washing won’t remove.
Step 1: The Strip Wash
We start by stripping away old waxes and sealants. Use a high-quality automotive soap with a higher alkalinity (or add a few ounces of All-Purpose Cleaner to your foam cannon). We want a “naked” clear coat or single-stage paint to work with.
- Pro Tip: Use the Two-Bucket Method. One bucket for fresh soapy water, one for rinsing your wash mitt. This prevents you from dragging dirt back onto the paint and introducing swirl marks.
Step 2: The Bag Test and Clay Bar
Once the car is washed and dried, put your hand inside a standard plastic sandwich bag and run it lightly over the hood. Does it feel like glass? Or does it feel like 400-grit sandpaper?
- If it’s rough, you have bonded contaminants.
- The Remedy: Use a detailing clay bar and plenty of lubricant. Work in small sections (2×2 feet). The clay shears off the bonded contaminants, leaving the surface chemically clean. Note: Claying will likely mar the paint slightly, so it must always be followed by polishing.
Step 3: Paint Correction (The Difference Maker)
This is where the $200/hr detailers earn their keep. Classic cars, especially those with single-stage paint (no clear coat), are prone to oxidation and “swirl marks” (spider-web scratches).
- For Light Swirls: A dual-action (DA) polisher with a medium-cut polish foam pad should suffice.
- For Heavy Oxidation: You may need a compound followed by a fine polish.
- The Goal: You want the paint to look “deep.” You aren’t just making it shiny; you are increasing the clarity of the reflection. When you look at the hood, you shouldn’t see the paint; you should see the reflection of the sky.
Phase 3: Protection – Wax vs. Ceramic
There is a massive debate in the classic car world regarding protection.
- Carnauba Wax: The traditionalist’s choice. High-grade Carnauba gives a warm, deep, “wet” glow that looks incredible on dark colors and reds. It hides minor imperfections well but lasts only a few weeks to months.
- Ceramic Coatings: The modern solution. Examples like Gtechniq or Ceramic Pro offer an impenetrable glass-like shell that lasts years. It provides insane water beading and UV protection.
My Advice: For a “Driver” classic, go Ceramic. For a show-only “Queen,” stick to a high-end paste wax like Zymöl or Swissvax. The warmth of Carnauba on vintage lacquer paint is indistinguishable magic.
Phase 4: Brightwork and Trim (The Jewelry)
A classic car is defined by its chrome. Bumpers, window trim, mirrors, and door handles are the jewelry of the vehicle.
- Chrome: Use a dedicated chrome polish. If there is light pitting (tiny rust spots), use #0000 Ultra-Fine Steel Wool with the polish. Warning: Do NOT use steel wool on plastic chrome or anodized aluminum.
- Rubber and Plastic: Vintage rubber seals dry out and turn grey. Use a restorative product (like Solution Finish) rather than a greasy dressing. You want the rubber to look factory matte black, not wet and slimy.
Phase 5: The Show-Winning Interior
When I judge interiors, I look for dirt in the seams. Anyone can wipe down a dashboard; a winner cleans the impossible-to-reach places.
1. The Compressed Air Trick
Before you vacuum, open all doors and use an air compressor (or tailored canned air) to blow out the vents, the seat rails, and the seams between the seat cushions. You will be amazed at the dust that flies out.
2. Carpet Stripes
Vacuum the carpets thoroughly. For that high-end look, create “stripes” in the carpet mats by brushing the fibers in alternating directions. It shows an immense attention to detail.
3. Leather Care
Vintage leather needs food. Old Connolising (painting) on British leather creates challenges, but for most classics, you want a PH-neutral cleaner followed by a conditioner.
- The Look: Leather should look matte, not shiny. Shiny leather is dirty or greasy. Buff off any excess conditioner with a clean microfiber towel.
4. Glass Clarity
Clean glass is invisible. Dirty glass creates glare.
- The Method: Use two towels. One for cleaning (damp with glass cleaner), and a second dry waffle-weave towel to buff away streaks.
- Top Tip: Roll the window down two inches to clean the top edge of the glass that sits inside the seal. Judges check this every time.
Phase 6: The Engine Bay & Undercarriage
This is the separator. This is how you win.
The Engine Bay
You cannot take a high-pressure washer to a vintage engine bay. The electronics (distributors, old wiring harnesses) are not waterproof.
- Hand Polish: Treat the painted inner fenders just like the exterior of the car.
- Details: Clean the underside of the hood. Polish the valve covers. Inspect hose clamps—are they aligned properly? Are the hoses dressed (matte finish, not glossy)?
The Undercarriage (Wheel Wells)
When you park on the show field, the gap between the tire and the fender exposes the wheel well. If it is caked in mud, the illusion of perfection is broken.
- Jack up the car safely.
- Remove the wheels.
- Clean the suspension components and the inside of the wheel wells with degreaser and a brush.
- Apply a spray-on undercarriage dressing to black out the wheel wells. This frames the wheels and makes them pop.
Phase 7: The “Day Of” Survival Kit
You have done the work. The car is gorgeous. But the drive to the show will inevitably introduce dust, bugs, and road grime. You need a “field kit” in your trunk.
Your ‘Go-Bag’ Checklist:
- Quick Detailer Spray: To lubricate the removal of dust or bird droppings upon arrival.
- Plush Microfiber Towels: Bring at least five. Never reuse a dropped towel.
- Glass Cleaner: For the windshield.
- Tire Dressing: Apply a fresh coat once parked (careful not to get it on the paint).
- Q-Tips: For final vent dusting.
- The Display Board: If you have one, ensure it is up to date and free of typos.
- Drip Pan: If you own a British or Italian car, park over a small, inconspicuous drip mat. It looks cleaner than an oil stain on the grass.
The Final Inspection
The night before the show, park the car in the garage and turn off the overhead lights. Use a high-lumen handheld flashlight (the kind detailers use) and walk around the car. The beam will simulate the harsh sun of the show field and reveal any missed wax residue, streaks on the glass, or dust on the rims.
Prepping a classic car for show season is labor-intensive, but the reward is tangible. It preserves the value of your asset, it ensures mechanical reliability, and—most importantly—it honors the history of the machine.
When you roll onto the show field, engine humming and paint gleaming, you aren’t just parking a car. You are presenting a work of art.
Good luck this season. I’ll see you on the lawn.